There are certain things in life that are best left to the professionals (dyeing your hair blonde, performing open heart surgery-you get the idea.) But basic car maintenance isn't one of them. Each month, mental_floss and GEICO team up to walk you through an essential auto-related task, helping you become that much more accomplished (and not to mention, more financially responsible) in the process. December's lesson? Removing a minor scratch on your car.
The Task: Taking care of a shallow scratch on your vehicle's exterior.
How Much a Pro Would Charge: Anywhere from $50 to over $500, depending on the depth, length, and location of the scratch.
You'll Need:
1) Dish Soap & Water
2) At Least Three Towels or Cloths (Preferably Microfiber-Based Products)
3) Masking Tape
4) 2000 Grit Sandpaper
5) A Rectangular Sponge
6) A Jar of Rubbing Compound
7) A Jar of Polishing Compound
A WORD TO THE WISE: DON'T TAKE SCRATCHES LIGHTLY
Scratches on your car are, unfortunately, a part of life. But when you find a brand new one, don't just ignore it: The paint on your ride helps protect it from the elements, and even a little mark can bring down a vehicle's resale value. Here's what to do the next time you spot a scrape:
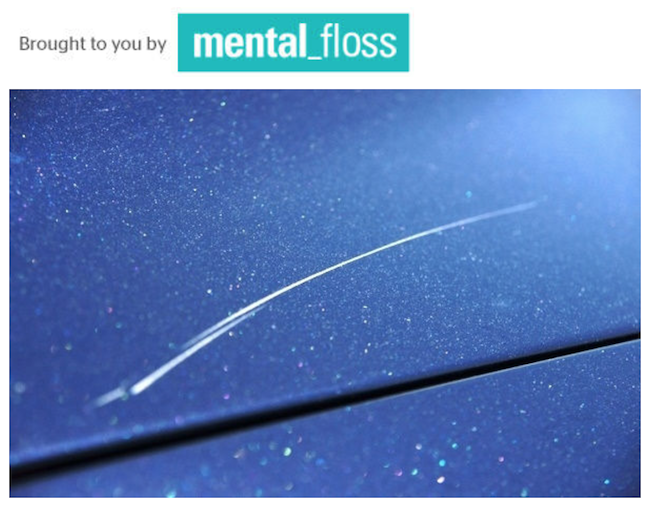
STEP 1: FIND OUT HOW DEEP THE SCRATCH IS
The good news is that many scratches are easy to remove. But not all of them are alike. You can't get rid of an offending mark until after you've assessed its depth.
A car's metal surface is buried under several different layers of material. The lowest stratum is the so-called primer coat. On top of this sits a basecoat of colored paint that gives the vehicle its signature hue (firetruck red, aqua blue, etc.). Finally, the top stratum is a see-through layer of protective wax known as a "clear coat."
In order to deal with your latest scratch properly, you've got to determine the number of layers that it's penetrated. Don't worry; this is an easy thing to figure out. Simply take your fingernail and drag it in a perpendicular line across the scrape. The objective here is to see if you can feel the edge of the scratch with your nail or not. If you can't, then the gash is what mechanics call a "clear coat scratch." This means that the mark in question is on the shallower side and hasn't affected anything below the clear coat. If you do feel the edge, that's because the scratch has penetrated the clear coat. If that's the case, you may want to take your car into a garage, as the repair process will be far more complicated and require some potentially expensive touch-up paint.
STEP 2: CLEAN THE DAMAGED AREA
At the onset, you'll want to make sure that the area around the scratch is as dirt-free as possible, as stray pieces of debris could carve new scrapes during the repair process. To clean the area, dip a clean towel in soapy water and wipe around the scuff mark. When you finish, gently dry everything off.
STEP 3: SET UP A PERIMETER
If you've never removed a scratch before, it's a good idea to create some visual boundaries. Use masking tape to construct a square or rectangle around the offending scratch; each side should be laid down about one inch from the mark itself. All of the sanding, rubbing, and polishing to follow will take place within this makeshift parallelogram.
STEP 4: APPLY WET SANDPAPER
Sandpapers exist on a gradient. Before you even think about applying a sheet to your vehicle, check the label. This should give the paper's "grit count," which is a measure of how large the abrasive particles are. For the task at hand, 2000 grit sandpaper is usually ideal. If a lower number is printed on the packaging, it means that the particles might be big enough to leave scrape marks all over the car.
Once you've reviewed the sandpaper's packaging, take a sheet and soak it in cold water for 10 to 15 minutes seconds. Wrap the wet sandpaper around a rectangular sponge, then very, very gently sand the scratch, rubbing in the direction of the original scrape (that is: if the scratch runs vertically, rub vertically, but if it's parallel to the ground, rub the paper from right to left.) Be sure to sand slowly; you wouldn't want to grate your way into the basecoat layer.
If you're worried about overdoing it, use a hole punch to crop out a small circle of sandpaper. Glue this piece to the eraser end of a new pencil. That will allow you to focus on very small areas at a time.
STEP 5: RINSE THE SURFACE AT REGULAR INTERVALS
Excessive sanding will cause more harm than good. After about 15 seconds, put the abrasive paper down and rinse the scratched area with some clean water. If the original scrape is still visible, it's time for another 15-second sanding session, followed by another rinse. Repeat this process until the scratch can no longer be seen. Afterwards, carefully dry the area using one of your microfiber towels.
STEP 6: BREAK OUT THE RUBBING COMPOUND
The sanding process will naturally dull your car's exterior. Also, despite your best efforts, there may be some new scuff marks left behind by the sandpaper. Don't panic: This is where the rubbing compound comes in. Pour a small amount of the product onto a clean cloth, then evenly rub the substance over the area you've been working on until the surface becomes shiny.
STEP 7: WASH THE WHOLE PERIMETER AGAIN
Once again, break out a (clean) towel-and some fresh water-and wet the whole area down. This will help you get rid of any unwanted refuse before the polishing phase begins.
STEP 8: POLISHING TIME
Put a drop or two of the polishing compound onto a clean cloth. Using a circular motion, apply it across the same chunk of real estate that you've previously sanded and covered with the rubbing compound. Once the surface looks shiny again, carefully peel off your masking tape and wash it down one last time. To ensure the paint job says looking like new, consider getting your car waxed regularly. (The soap and sanding will have stripped any wax that previously covered the spot you just fixed.) Once everything looks good, rest easy knowing there's one less clear coat scrape in the world.
Opinions expressed by the author are not necessarily those of WITI.
Are you interested in boosting your career, personal development, networking, and giving back? If so, WITI is the place for you! Become a WITI Member and receive exclusive access to attend our WITI members-only events, webinars, online coaching circles, find mentorship opportunities (become a mentor; find a mentor), and more!
Founded in 1989, WITI (Women in Technology International) is committed to empowering innovators, inspiring future generations and building inclusive cultures, worldwide. WITI is redefining the way women and men collaborate to drive innovation and business growth and is helping corporate partners create and foster gender inclusive cultures. A leading authority of women in technology and business, WITI has been advocating and recognizing women's contributions in the industry for more than 30 years.
The organization delivers leading edge programs and platforms for individuals and companies -- designed to empower professionals, boost competitiveness and cultivate partnerships, globally. WITI’s ecosystem includes more than a million professionals, 60 networks and 300 partners, worldwide.
WITI's Mission
Empower Innovators.
Inspire Future Generations.
Build Inclusive Cultures.
As Part of That Mission WITI Is Committed to
Building Your Network.
Building Your Brand.
Advancing Your Career.

Comments